To add essential elements like style, definition, and, most importantly, durability, tiles are an excellent option for fibreglass pools.
Installing tiles in a fibreglass pool is no rocket science; you can do it with little research. Tiling fibreglass pools is not very different from tiling a standard pool. You can achieve the desired results quickly with the right tools and knowledge about the procedure.
Suppose you plan to use a DIY project to tile a fibreglass pool tile; remember that you need extra help for the grouting process. To know more, keep reading!
Types Of Tiling For Fibreglass Pools
If you own a fibreglass pool, there are three techniques that people opt for when tiling. Let’s quickly take a look at what they are.

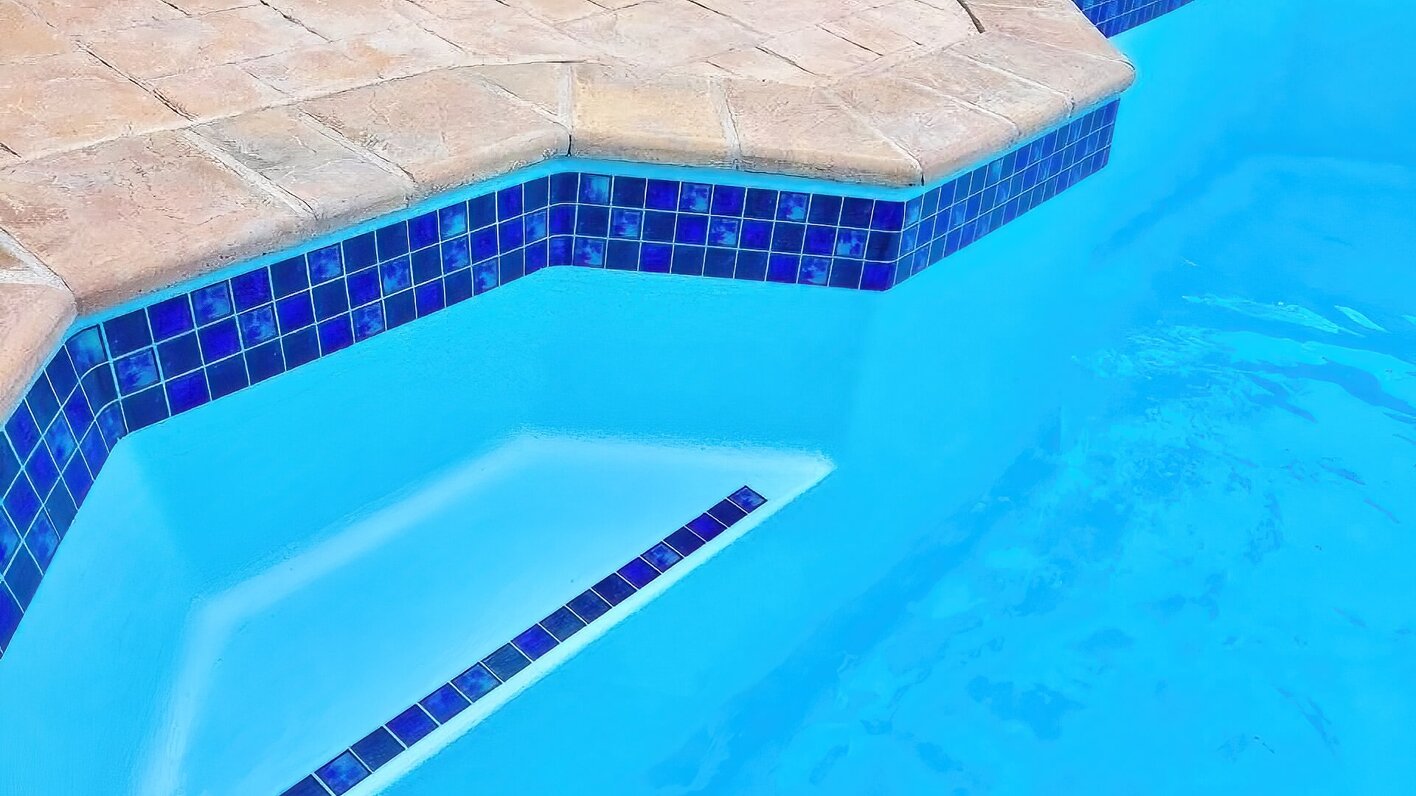
1. Inlay (Over The Lip) Tiling
When opting for this method, you must create recesses for the pool tiles, and each tile will be cut precisely to fit the recess. Many people prefer this technique because it has several advantages.
When using over-the-lip tiling, there is no need to wax the exposed fibreglass lips separately. It is also super convenient to clean the grout and the pool tiles. You can use a wet cloth or sponge for the purpose, and rest assured, the grout will not crack, stain, or get dislodged.
The best part is selecting the materials and colours to match your sense of aesthetics. If you choose this installation process, the tiles will perfectly fit your deck and pool.
However, it is essential to remember that getting a new custom-fit tile can be pretty costly if a tile comes out.
2. Water-Line Tiling
If you want to tile your entire pool, this method is the one. For this, you will have to put a few rows of tiles where the waterline tiles of your pool will be.
If you opt for this method, you can enjoy some significant advantages. First, it will enhance the beauty of your pool and add great definition to it. The best part is that you will have various colour and style options.
Also, once installed, maintenance will be much more straightforward.
3. Custom Tiling
You should go for custom tiling to give your pool the touch of ultimate luxury and durability. It can turn the dull bottom of your fibreglass swimming pool into something beautiful. To embark on this project, you would first need to get your hands on a few things:
- Silicone rubber grout
- Epoxy grout float
- Acetone
- Pool tile sheets
- Bucket
- Dish soap sponges
- Nylon scrubbing pad
- Someone to help with grouting
- Silicone tile adhesive
To find the best custom tile fit, follow these steps:

1. Prepare The Pool
The first thing to remember when installing tiles in your fibreglass pool is not to do it when there is water. You would need to drain the pool properly and use a wet vacuum or a dry cloth to ensure that the pool is not moist.
Once it is dried, sand the bottom of the pool and remove all unwanted dust and debris before cleaning the entire pool surface with acetone. Let the pool dry out properly before proceeding to the next step.
2. Taking The Tile Measurements
To accomplish the project, you must figure out the number of tiles needed to cover the area. Glass tiles usually come in sheets, and you must know their sizes properly.
To get a rough estimate, you can begin by measuring the width of the pool. This will give you a fair idea about the number of tiles you need. Ensure all the tiles are the same size so your layout looks even.
If some are not even, you can use a wet saw to make them uniform.
3. Applying The Adhesive
For all the other techniques, you need to apply the glue directly to the pool floor. However, in this case, you must apply a thin silicone adhesive layer to each tile. It would be best to use a spatula to ensure the adhesive layer is uniform.
Do not forget to spread the glue evenly at the back of the tile to simplify installation.
4. Installing The Tile
Assess the pool area properly to determine where to start putting the tiles. Once you have the measurements right, place the tiles horizontally and apply some pressure to ensure they stick to the bottom of the pool.
5. Grouting
For this step, you first need to find a tile grout mix of your choice. When the adhesive has completely dried up, apply the grout mix between the tiles using a putty knife.
Remember to use detergent and scrub the excess grout off to give the project a final touch. Then, rinse with clean water and dry with a wet vacuum, and you are good to go.
Tiling Your Fibreglass Pool
That’s all we have for you, folks! We hope you enjoyed learning about the methods for tiling a fibreglass swimming pool.
Always choose a technique, considering the resources you have at your disposal. With suitable tiles, your fibreglass pool can undoubtedly get a complete makeover, so follow these steps.
If you have anything to share, write to us in the comments below. Do not forget to watch this space for more exciting reads.
Until next time, adios!


